

CLEVELAND — We are back with Part 2 to our "Operation Oscar's Fence" project, which involves building a fence for my friends and colleagues Stephanie Haney and Mike Polk Jr. — and their dog, Oscar Wilde McCool.
To check out Part 1 of the project, click here
Last week, we installed fencing posts into the ground, and one thing we did not mention that is so important when digging: Always, always call the gas company or 811 to come out and check that you're clear of any gas lines before digging. We did do that ahead of time, and wanted to make sure we brought that important step up again.
Now, Part 2 of our project does not involve digging, because the rest of Oscar's fence involves drilling our posts into concrete, and it's definitely the more challenging part of the project.
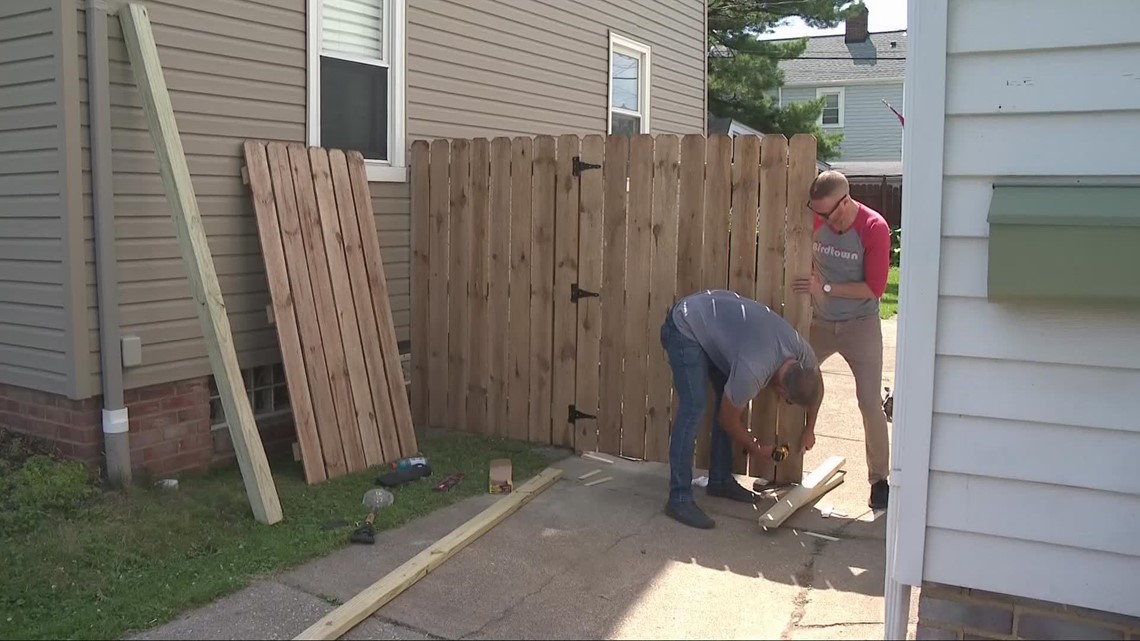
But before we get to that part, we're going to build out our swinging gates. The best way we've come up to do this is to brace our first section of fencing (the section from Part 1) with a 2x4 and another 4x4 next to it. We also planned to add some brackets for stability before mounting our first swinging gate to the 4x4 post.
But, we quickly ran into some unexpected issues. Unfortunately, for a fence this tall and wide, we needed more support below ground to keep the gate from sagging across Mike's driveway.
That’s where Ohio Concrete came in. Stephanie and Mike hired their crew, and with the help of Austin and his 8-inch concrete coring drill, we had big enough holes drilled through the concrete so that we could dig post holes deep enough to properly support all of the weight above ground.
Finally, we had gates!

Now, the rest of Oscar's fence is going to be installed on posts that need to be secured into concrete. That requires a few extra steps and some different tools, like a hammer drill. I didn't own one, but Stephanie was smart enough to think that we would rent one, and it's made the job of drilling holes into concrete about a million times easier.
With that, we got to work putting up the rest of our fence posts along Mike's sister Erin's driveway. Because these are stationary fence panels and not swinging gates, we could mount them to the surface of the concrete using anchors with no support problems.
That said, fair warning: Drilling even small holes into concrete is tedious and slow work.
As the days ticked on, we finally got all of our posts up. Then it was time to hang our panels, and just like last week, we took care to make sure each section was level.
One quick tip here: Don't take shortcuts when it comes to leveling and spacing. It will show when you look at the fence from a distance. Take your time, make it straight.
Over a week into our project, it was time to tackle our final step: Installing the right hardware to keep the gates closed and keep Oscar inside. Here, we used a slide bolt at the top, a tee latch to use to open and close the smaller gate, and cane bolts (also known as drops rods) to keep everything secure at the bottom.
And finally, Operation Oscar's Fence has been completed. It may have tested our patience, but it was all worth it in the end.